Semester B has been incredibly tough, which isn't a excuse for not posting anything the whole time, I've just found it really hard to start posting again.
Sememter B pretty much wrapped up on Friday with Film Day, which shows the best work from the 3rd years, as well as the odd piece from 2nd year. It was a really awesome day, I even got a free uhanimation T-shirt for helping out. I'm feeling pretty motivated to do work because of it, or prehaps more being scared into doing work because I'd be gutted if my 3rd year project didn't make it into film day so I need to keep up the work over the summer.
You can find all the film day films at:
uhanimation.co.uk/expose
I'd highly suggest cheaking them out, because they're all really amazing.
I guess now is a good time to post up some of my work from this semester, I might post some more stuff later, before I start working on a personal summer project.
My animation show reel
Animation Showreel from Victoria Newbery on Vimeo.
Showreel Summer 2014 from Victoria Newbery on Vimeo.
Sunday, 1 June 2014

Friday, 10 January 2014
Final renders for digital systems project

The final racing car render


It's kind of weird knowing that this units finished now, I learnt a hell of a lot from it. I am pretty annoyed at myself though, because I seriously fell behind over the Christmas holidays so finishing everything for the deadline was one serious rush. Luckily my tron bike, toy car and shark were pretty much finish and so didn't really suffer for it. I'm somewhat ashamed of how unfinished and bare my table loos though.
Anyway here are my other renders for this project.


Monday, 30 December 2013
Toy Car progress

Mesh

Mesh with UVs

Monday, 23 December 2013
Racing Car base mesh

I
got the base mesh finished for the racing car (and most of the wheel)
after my second attempt. The shape of the front headlights is still
pretty rubbish, but I’m not going to worry too much about that right now
since I’m more concerned about how I’m going to reduce the density of
the mesh along that edge. Cutting the mesh into sections may be a
solution, but I think I’ll try and finds some models of similar cars
that show the wire frame first to see if that gives me any ideas.
Saturday, 21 December 2013
Out of the Box Toy - Racing Car

After placing front top and side
images into maya I started modelling using curves that followed the
main shape of the body like we were taught for the tron bike. This
was a little tricky because the part with the lights sticks up above
the main bonnet, which meant that I had to guess the shape of it to
an extent.

After lofting them into a
polygon, I started to extrude around the bottom of the side. Then
extruded inwards and up between the two wheel to model most of the
side.

I then started to fill in the
gaps between the top and the side. I had a bit of a problem getting
them to join up neatly but I'm not too bothered as I intended to use
this as a base mesh like I made for the shark.

I knew my reference pictures
weren't quite straight and so I was already compensating for that
while modelling. However I hadn't realised that the scale and
alignment was quite as far out as it is until I started working on
the front lights.

So I'm going to retake the
images and make sure that I line them up properly this time. I'm also
also going to try tracing the images so that I have actual lines to
work from because I was finding it quite difficult to see the shape
of the car once there's polygons in front of it. Then I'll see if I
have to restart the model or not.
Sunday, 15 December 2013
Character Design

A little bit about my character
Her name is Kristina
she's a 16 year old living in Munich in 1930
she has the loudest shout in the world
she has large muscular forearm
and she fantasises about being a slave of Satan
I really want to know who came up with these... some of the other characters were crazy.
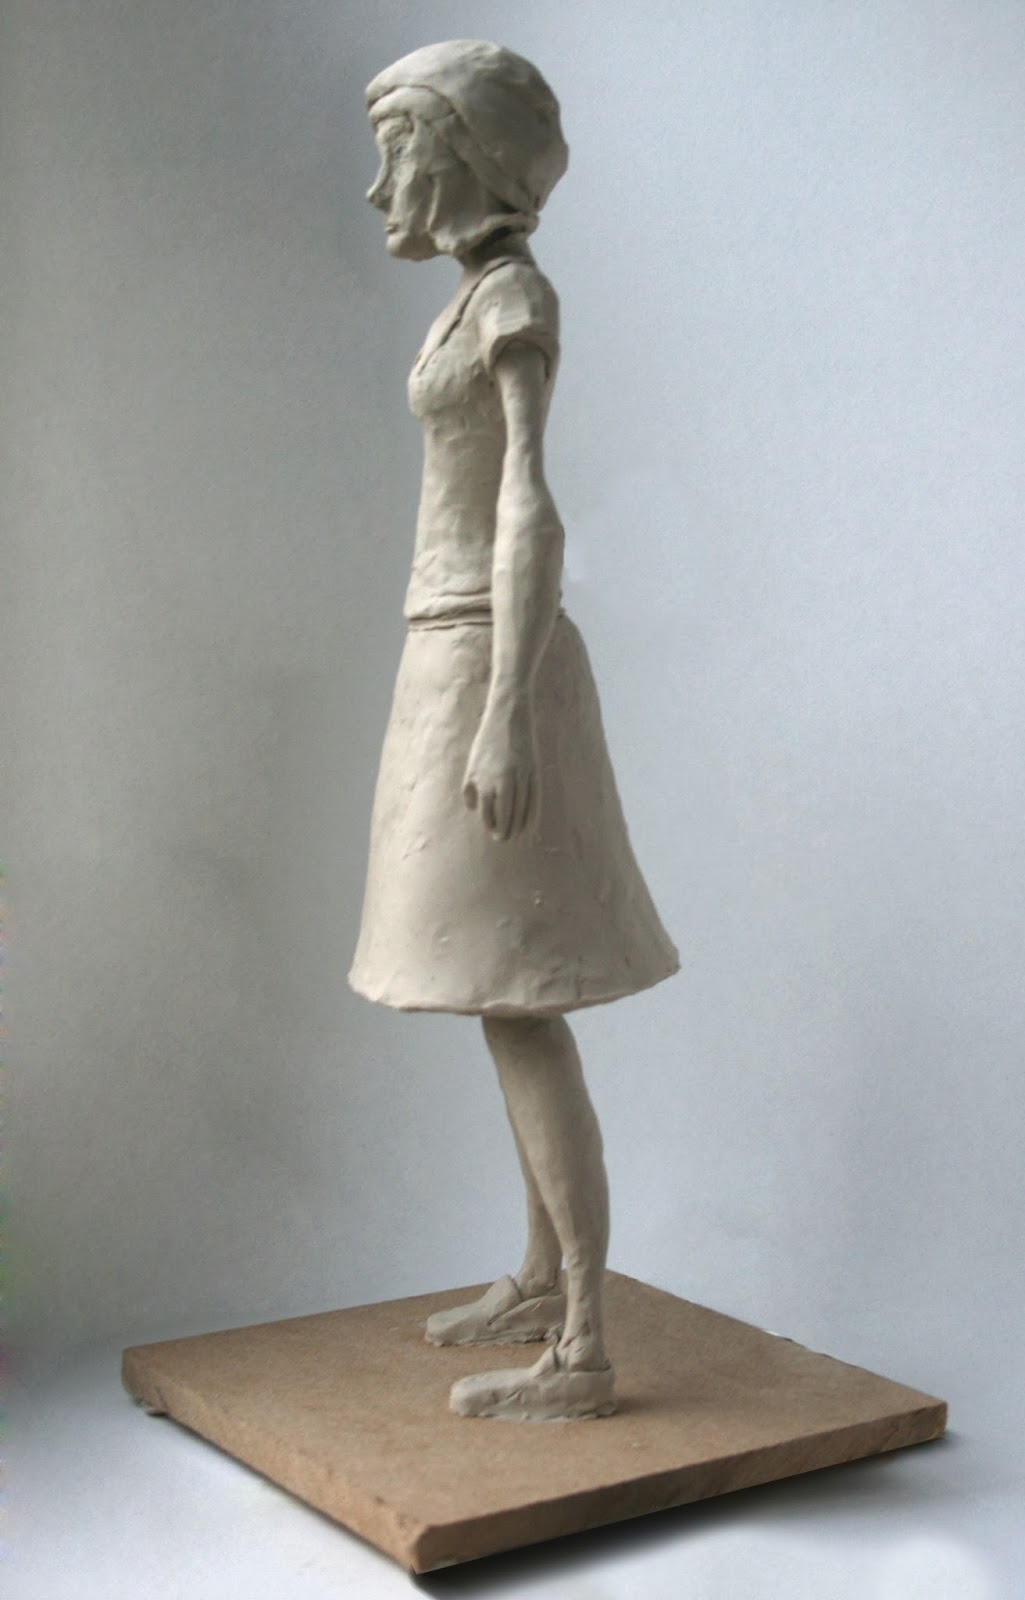
Anyway the image at the top is my character turn around, which is painted in water colours. We also had to make a plasticine maquette, which was pretty fun too.


Pipes
I haven’t added any progress updates in a while,
which I’ll probably add tomorrow since I ended up spending this evening
working out how to make pipes rather than spending time on my logbook.
I wanted to add some pipes to my podracer and trying
to make them by extruding a polygon cylinder doesn’t seem to work very
well. Seeing as I’m not in a class I decided to google different way of
making them.

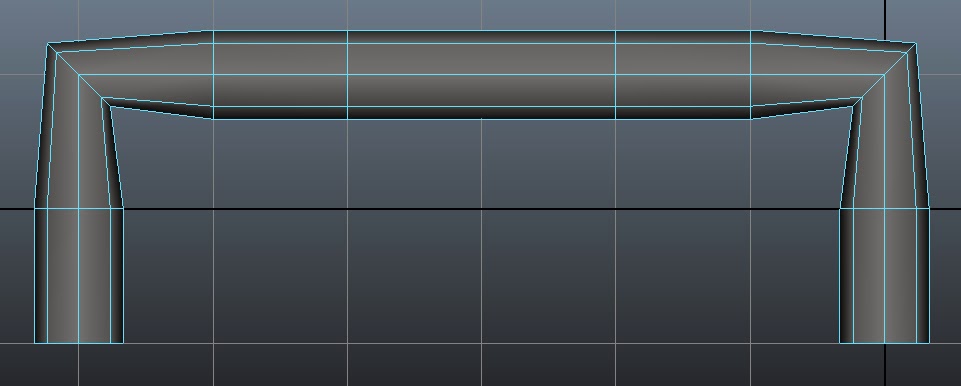
A lot said to make a curve and then extrude a nurb
circle around it. This did work, however I couldn’t get the corners to
look right. I think this is to do with my lack of knowledge of how the
different curve tools work. I made the curve using the cv curve tool
that we used for the tron bike and when extruding used snap to control
points. I think the problem was that the curve points don’t lie on the
actual curve and there isn’t enough of them.


Method 2

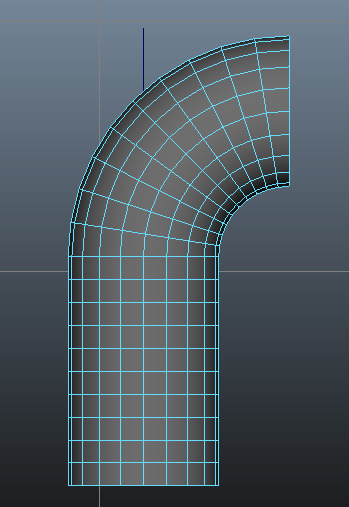
Using Bend deformers
create a cylinder and increase the hight divisions in the channel editor.
Go to the animation menu
create deformers > non liner > bend
adjust curvature in channel editor
this makes the bend in the pipe so extrude the edges for the straight parts.
edit
you can increase the number of control points on a
curve by going edit curve > rebuild curve. However I found that it
had to be increased to about 45 before the corners looked nice, but the
extra edge loops on the straight parts can just be deleted afterwards.

I found using the bend deformer easier and quicker to
get looking right, however I expect that the cv curve method would be
quicker if you were planning to make a longer pipe with lots of corners.
Thursday, 5 December 2013
Work from earlier digital systems lessons part 3 - Shark
Work from earlier digital systems lessons part 3 - Shark
shark lesson 1making a base model means that you have to worry too much about the topology.
Start with a cube with and shape to make top of sharks nose.
Extrude down to make mouth then back for the body.
Extrude out fins

Once the shape of the shark is finished, smooth the object twice
press make the selected object live and use the middle mouse button to snap vertexs of the new model to it.

Shark lesson 2
Uving shark
Delete one side of shark, the remaining half can be duplicated, flipped and stitched back together one the uvs are done.
Use create uv’s based on camera angle
Unstitch the fins and uv separately
use unfold to fix distortions created by using the camera angle.
Use uvref image to check for other distortions and that the normals are around the right way.
For front fin.
UV top and bottom separately using create uv’s based on camera angle


Texturing

Seams are difficult to fix in photoshop, so Lewis suggested to use Mari
I have a feeling that I managed to move the uv’s after taking the uv snapshot, which would explain this

Tuesday, 3 December 2013
Shark
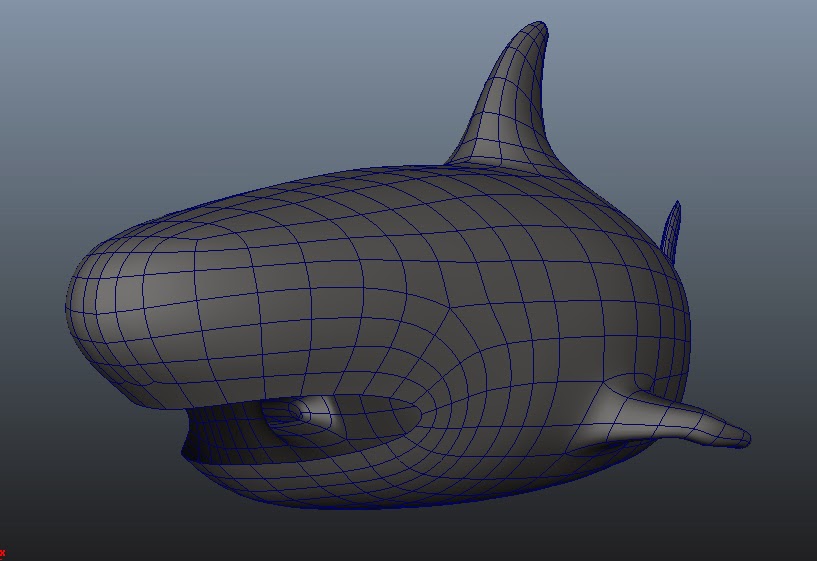
I realised I hadn't posted up my shark at all. This is actually version 2
of it as my original one was so out of proportion and had kind of
blobby fins. Still need to finish it though. I doesn't even have a proper mouth at the moment. Or eyes... Or teeth. And a shark isn't much of a shark without teeth.


Tron Bike progress

Besides a few details, I'm
pretty much done with the modelling part. I was going to finish Uving
it tomorrow but after looking at my shark and realising I had done a
lot less of it than I thought, I'll work on that instead. I really am
still far too slow at modelling.
Thursday, 28 November 2013
Wednesday's lesson - UVing
Spent the lesson Uving a head
for practise, I didn't finish, but it was definitely worth it
because it makes everything that I need to model for this module seem
a lot easier than they did before.
I don't know who modelled the head, it was just given to us by the lecturer for practising UVs.
I don't know who modelled the head, it was just given to us by the lecturer for practising UVs.


For the most part it was just
splitting the object up into flattish planes and using the uving
based on camera angle. Then unfolding them as much as possible then
stitching them back together. The ears, eye balls and the inside of
the mouth and nose remain separate to prevent over lapping UV's.
Wednesday, 20 November 2013
Podracer continuation

I redesigned my pod racer again.
I'm actually happy with it this time, although now I'm just
experimenting with adding different parts. Hence why the cylinder
like shapes aren't attached, as I was just seeing if I liked them
there.
I also started trying to make
the engine look less like it's based off a portal gun. It isn't, it
just looks like it. I changed the shape of the underneath part. It
looks better up the other way, but I may just delete that part and
redesign it anyway.

Sunday, 17 November 2013
Tron bike progress

I had to redo the main body of
the bike because the curves I had used we too uneven at the front of
the bike, so it looked terrible even when smoothed. I also notice
that the model was actually a lot more detailed complicated than I
origionally thought, and so also had to take this into account when
remodelling.
Saturday, 16 November 2013
Work from earlier digital systems lessons part 2 - Tron Bike, lessons 2 and 3
After the second week

Class notes
Tron Bike week 1
File > Set Project > tron bike
Use the CV curve tool and revolve to model the different parts of the wheel.
Move the pivot point before revolving as it’ll revolve around that point
Lofting- for tron bike main body
Follow the shape in the side view with the cv curve tool
Duplicate and move the curve so that it follows the shape of the bike.
Select these curves and use the loft tool to create a polygon.

Tron Bike week 2
Fill side of bike using append to polygon tool
Add horizontal edge loops and shape around wheels
Cutting out parts for wheels
Duplicated and scale to -1
Join the 2 halves together using merge edge tool
add edge loops and cut of parts of frame

UV mapping
assigning Uvref to object
in hypershade, select lambert
next to colour click on the checker board
click file and add image
select the object, right click on lambert > assign to object
select object
create Uvs > choose type of mapping
adjust in UV texture editor
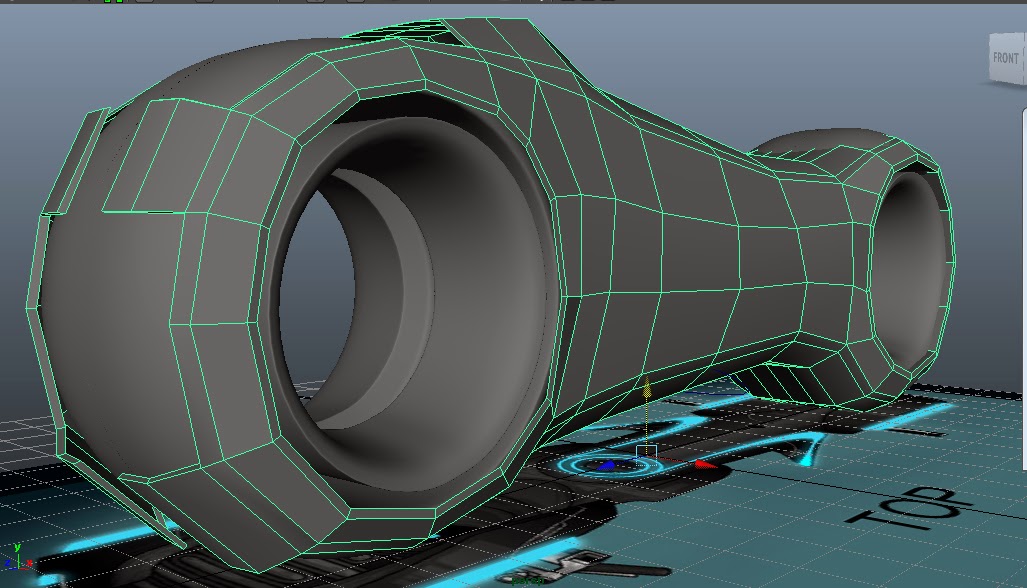
Class notes
Tron Bike week 1
File > Set Project > tron bike
Use the CV curve tool and revolve to model the different parts of the wheel.
Move the pivot point before revolving as it’ll revolve around that point
Lofting- for tron bike main body
Follow the shape in the side view with the cv curve tool
Duplicate and move the curve so that it follows the shape of the bike.
Select these curves and use the loft tool to create a polygon.

Tron Bike week 2
Fill side of bike using append to polygon tool
Add horizontal edge loops and shape around wheels
Cutting out parts for wheels
Duplicated and scale to -1
Join the 2 halves together using merge edge tool
add edge loops and cut of parts of frame

UV mapping
assigning Uvref to object
in hypershade, select lambert
next to colour click on the checker board
click file and add image
select the object, right click on lambert > assign to object
select object
create Uvs > choose type of mapping
adjust in UV texture editor
Friday, 15 November 2013
Podracer this week
12th
November
Continuation of Pod racer
I just started to refine some of
the shapes, for example the side part now curves with the main shape
rather than being vertical. I also added a ring to connect the bottom
part to (highlighted) because I was thinking that maybe the part
underneath could spin.
Te bottom part still needs a
little work, the shape is kind of odd.

13th
November
Pod racer lesson 2
Due to my usb stick dying I
decided to work on the pod. This was really hard, probably because I
haven't really got a firm idea of what it should look like in my
head.
I started with a cube, but after
deleting multiple faces, I might as well have started with a plane.
I just extruded edges and then
moved vertexes in the orthographic views. It ended up being a very
slow way to work and I'm not particularly happy with the out come.

Monday, 11 November 2013
Work from earlier digital systems lessons part 1 - The Table
Modelling a table was really just to introduce us to the basics of Maya.
Notes from class


Notes from class
Create cube
Snap the pivot point to one of
the top corners of the cube.
-Press insert
-move while holding v
-Press insert again
Snap pivot with the corner of
the desk.
Scale leg till level with grid
Duplicate (ctrl+D) and move each
leg to other corners
Change rotations to match
Edge loops are needed to retain
sharp edges when objects are smoothed
Edit Mesh > insert edge loop
tool


Curve Tool
create > CV curve tool
plot points on a 2D plane
around the centre line
Select surface in the drop down
menu
surfaces > revolve (the
little square for the options)
-check axis being used
-Output geometry as polygon
-quads
-control points
Check for non-quads
Table after first week

For a first try I was fairly happy with this, however the table legs and scale really needs to be addressed and they really just don't work.
Saturday, 9 November 2013
Concept City Street Project


I loved this project and learnt a lot from it. I may have been pretty good at perspective drawings to start with, but designing urban landscapes was something that I really didn't have a lot of experience with. My use of colour has also gotten so much better. Before I used to use a lot of different bright colours and avoided both realism and restricted colour schemes because for some reason they always had a tendency to look muddy. Not a great look.
Anyway I can always say that I could have done better, but I'm actually really proud of these.
Friday, 8 November 2013
Digital Imaging Lesson
This lesson was based around using photos as a starting point for creating character designs. This was done through photo collage, digital painting and the use of other tools in photoshop.
I found the photo I started with online, however because I never intended to post it and was only messing around with it in class I don't have the reference for it. But I'm pretty proud of it for 2 1/2 hours work..so yeah... perhaps being a little naughty here.

I found the photo I started with online, however because I never intended to post it and was only messing around with it in class I don't have the reference for it. But I'm pretty proud of it for 2 1/2 hours work..so yeah... perhaps being a little naughty here.

Thursday, 7 November 2013
Podracer so far
Okay so maybe I didn't do any more. But like I said I would I'm posting my progress that I've made on my podracer.
 I made the main part of the engine as 3 parts, an inside, a middle and an outside part. All using cylinders. For the rest I just started with cubes and extruded them. It's still pretty basic, no detail yet, but I happy with the over all shape. And considering that something when wrong with nearly every piece I think I did pretty well to get this far anyway. For example I forgot to reduce the number of subdivision down to 12 from 20 and by the time I realised it was too late to easily fix it. Other parts just went really weird when I pressed 3. I have a feeling it was because I was trying to extrude the edges around a face instead of the actual face.
Subscribe to:
Posts (Atom)